9 Volt Battery & Coca Cola Titanium Anodizer

After blowing the circuit breaker and fusing a dimmer coil with a bridge rectifier at 130v DC, it was time to start small — one 9v battery at a time.
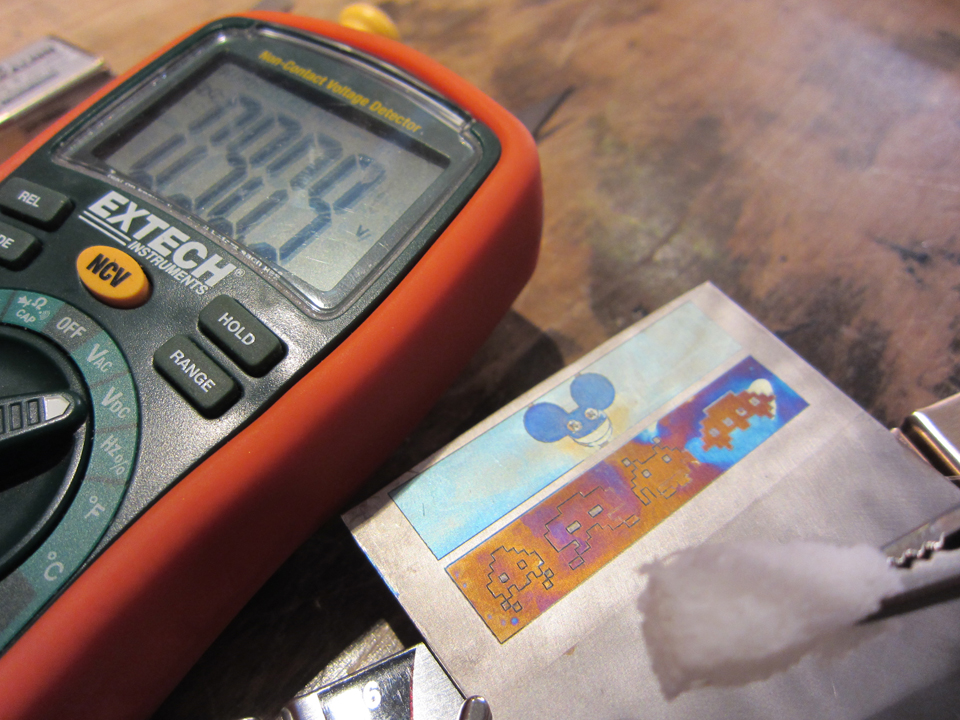
I’ve been wanting to anodize titanium and use the laser to create masks for the different colors. Translucent oxides form on titanium with heat or voltage. (I also tried lasering colors into niobium, which oxidizes similarly to titanium, but didn’t find the color band with the CO2 beam — just grey/black.) With both niobium and titanium, each volt corresponds to a thickness of oxide and refraction of a color. If you start at the highest voltage and work your way down to the lowest voltage for the colors you choose, theoretically, you can strip off the protective tape mask after each color is obtained and the thicker oxides (higher voltages) will be unaffected by lower voltage oxide layers. In essence, when anodizing with a tape mask, you are using a reductive method of printmaking like linoleum block printing, only the ink is an oxide layer.
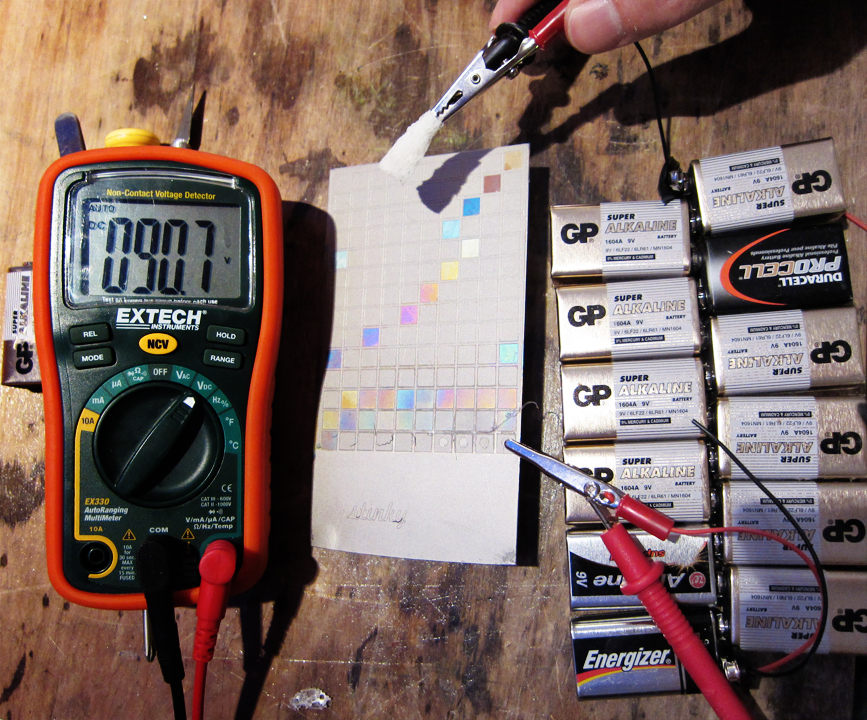
How it works – DC voltage is applied to the surface of the titanium/niobium with a sponge clipped into an electrode. The ideal electrolyte to complete the circuit is phosphoric acid, so you wet the sponge with cola, or a solution of TSP, Cafiza, or Miracle-Gro. Two factors determine the oxide layer thickness: Voltage and time. If you vary the speed of your sponge with the electrolyte across the titanium, you’ll get a variety of colors due to incomplete oxidation at and below that voltage. It’s also possible to make a gradient by starting slowly and speeding up as you sponge across the metal.
The image above shows voltage swatches from 1v to 140v. (Most of the swatches haven’t been oxidized yet.) The little squares were cut with the laser into clear packing tape and peeled off for their specific voltage. The first yellow swatch was easy — one 9v battery. As the batteries were chained in series, the voltage was read (some were weaker) and the corresponding swatch was oxidized. 99v (12 batteries) is a beautiful green that I will definitely use again. The red at 18v is also noteworthy. When the new rectifier arrives, I’ll fill in the in-between voltages on the swatch sheet. It’s really liberating to be able to anodize without a $500+ commercial anodizer.

A little background on my motivation: I have a daily project (ringaday.com) that continually challenges my creativity and craftsmanship. NYC Resistor is the perfect environment to explore a variety of mediums, processes, and ideas. I’m partial to the laser. It puts the rapid in rapid prototyping. Join us for Craft Night one Thursday evening and come away with inspiration for your creative idea.

Is this only possible with titanium or can this process be used for aluminum as well?
aluminum also changes color when anodized. (ex: ipod mini casing)
I thought aluminum needed a die to be added to the mix. I wasn’t sure if this was a chemical reaction that only worked on titanium or if you could find a similar reaction for aluminum using this or another acid. I’ve looked into different processes and the steps for aluminum seem to be an acid bath followed by a submersion in the die compound at a specific temp. The whole process is sealed using boiling distilled water I believe.
It might be possible to mix the die with the acid solution and try to apply it at one time with a process similar to this. Voltage and time would probably not determine the color so you could get more consistent results.
Wow! That’s awesome! In dumb-idea land, I wonder if you could coat the titanium with a thin paint-on mask, like a spray paint or silkscreen emulsion, then set up the anodizing bath inside the laser cutter, and then use the laser to very precisely burn off the mask while it’s in the bath, giving you very precise control on what gets anodized what color–basically letting you vector/raster colors onto your workpiece. I’ve never tried to use a lasercutter to cut or mark anything inside a liquid, though–this would only work if you could burn off the mask while it’s in the bath.
Either way, AWESOME project
I read your technique a little more closely and realized I didn’t understand the way you were using a sponge to hold the electrolyte. What if, with your sponge technique, you laid a thin sponge, or even just a piece of paper soaked in electrolyte, over your piece and apply a voltage to the paper. Then, use the laser to burn off the paper where you don’t want it anodize the metal, and adjust your voltage to set your color.
You’d have to start with low voltages and work your way up, so it has the limitation that your largest areas would have low voltage colors and your smallest areas would have high voltage colors. And, of course, you have to get voltage to all parts of your sponge, so you couldn’t have islands in your image. Everything shape in the image would have to be connected with a thin bridge, like in a stencil.
now I wish I had a laser
Little tip I think could work to access «in between» voltages: add a selector switch on which you solder a series of 12 diodes on top of the circuit of batteries. Each added diode would drop the end voltage by 0.7V, giving you a range of voltage in which you could choose.
So, per example, if you have 3 x 9V batteries, the total voltage is normally at 27V, By adding the selector, you could drop the voltage to 26.3V (one diode), 25.6V (two diodes), 24.9V (three diodes), and so on, down to 18.6V (twelve diodes = a drop of 8.4V). The next step down would be use two batteries without the diodes, so 18V.
Schematic: http://yfrog.com/j8capturedu20120923120504hp
*Not sure about the 1N4148. It came by default when I used https://www.circuitlab.com/editor/
If it works (I think it will), you will not have a dimmer per se, but something more flexible than just 9V steps.
If you don’t have a selector switch (with 12 or 13 positions!), you could just solder the diodes in series and use a jumper to switch between the diodes. Diodes are pretty cheap.